Un-Bricking an EverDrive Clone, AKA Fixing the Dreaded “Authentication Error” (part 3)

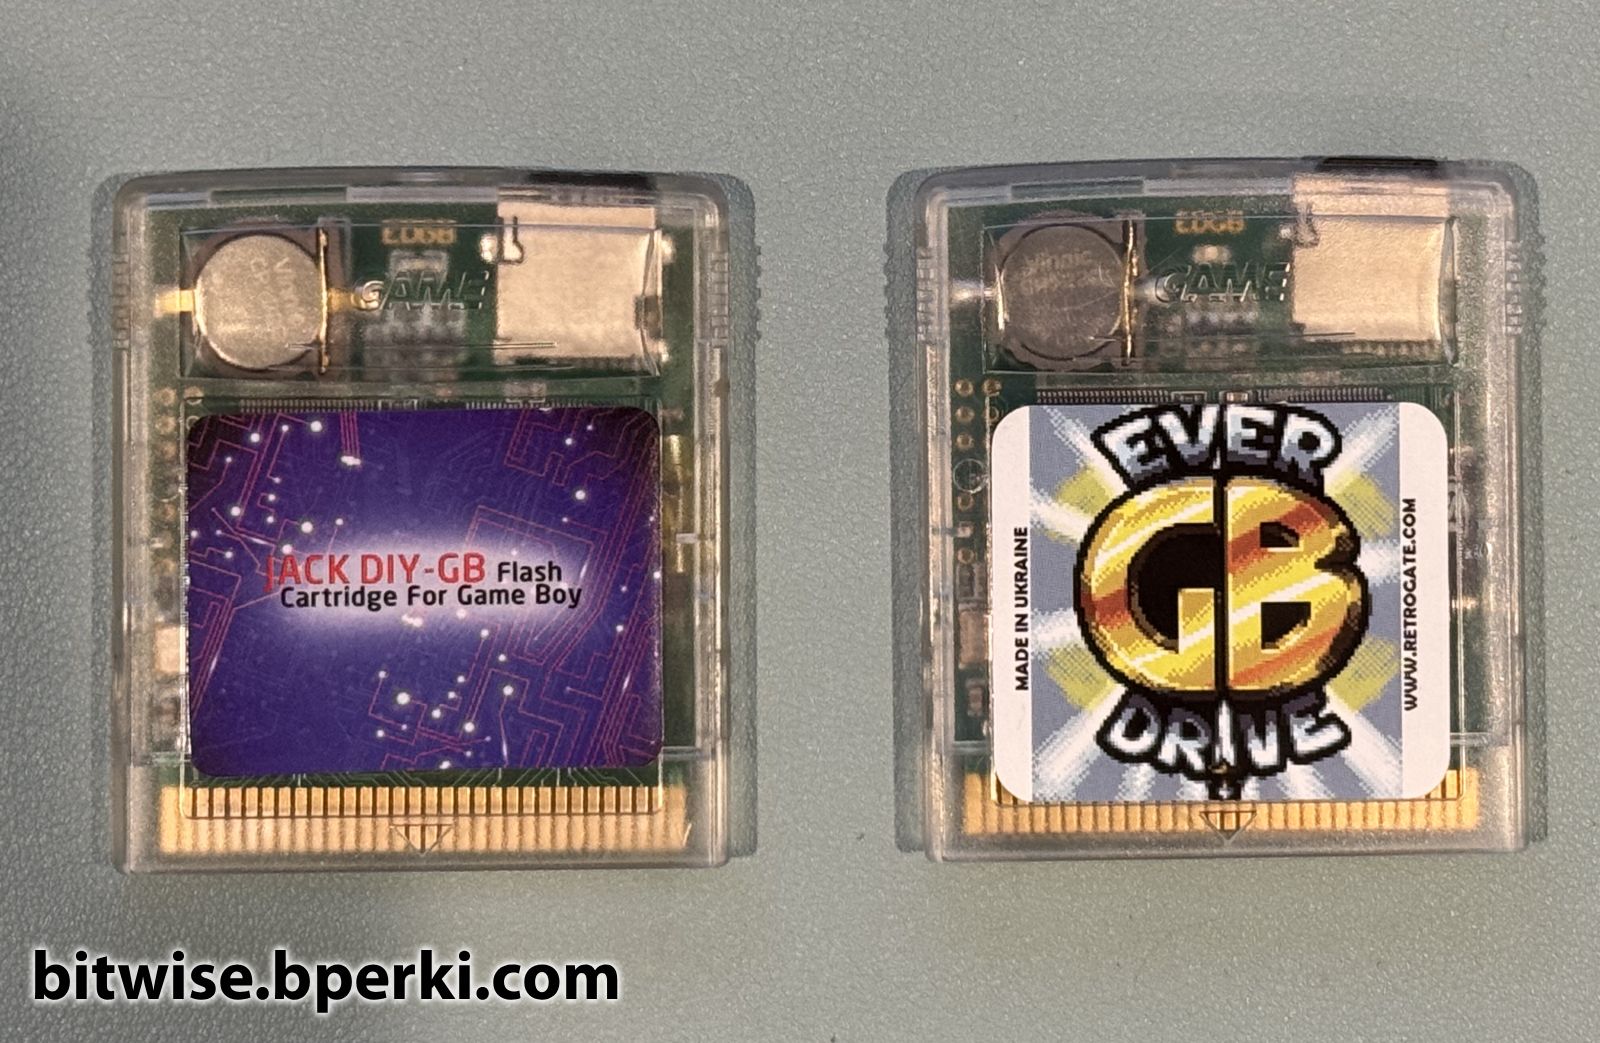
Ok, so far we’ve seen how we can fix a bricked EverDrive clone by desoldering the flash chip and by using an external programmer. However, we can take this one step further – EverDrives reprogram their own flash memory using nothing but the Game Boy as a programmer, so why can’t we? The obvious answer seems like “because we can’t run our own code when another cartridge is plugged in”, but fortunately for us, that’s not true! You see, the Game Boy doesn’t actually care where the code it runs lives and it has 8kB of internal WRAM (32kB on the Game Boy Color). So all we need to do is write some code to un-brick the cartridge, copy that code to the internal WRAM, jump to it and then we no longer have a need for the cartridge. We can remove the cartridge that originally contained the code and replace it with another one, say a bricked EverDrive clone, and then our code can interact with the newly inserted cartridge.

Let’s take a look how this works in practice:

CopyToRam:
    ld hl, _RAM ; Load the location of WRAM into hl
    ld d, high(RAM_CODE_SOURCE) ; Load the location of our code
    ld e, low(RAM_CODE_SOURCE)  ; to copy into de
.copyByte
    copy [hli], [de] ; Copy a byte and increment hl
    inc e ; Increment the lower byte of the source address
    jr nz, .copyByte ; Unless we reach an address ending in 0x00, loop
    jp _RAM ; Jump to the code we just copied to WRAM

Continue reading Un-Bricking an EverDrive Clone, AKA Fixing the Dreaded “Authentication Error” (part 3)

Un-Bricking an EverDrive Clone, AKA Fixing the Dreaded “Authentication Error” (part 2)

In the last post, we looked at a method of repairing a bricked EverDrive clone by desoldering and reprogramming the flash memory chip. Now we’re going to dive into the EverDrive code, look at how it marks counterfeit cartridges and figure out how we can recover them… All without touching a soldering iron! In order to get started, we’re going to need two things: the EverDrive firmware file and a Game Boy ROM disassembler, both of which are easy to find online. First, we’ll grab the latest firmware version, v4 from the official Krikzz website. Next we’ll need to download mgbdis, which is available on GitHub. To disassemble the ROM, simply run:

./mgbdis.py GBOS.GB

Continue reading Un-Bricking an EverDrive Clone, AKA Fixing the Dreaded “Authentication Error” (part 2)

Un-Bricking an EverDrive Clone, AKA Fixing the Dreaded “Authentication Error” (part 1)

Wow, it’s been how long since I made a post here? Six and a half years? I’m sure you were all waiting with bated breath. Anyway, let’s look at the subject of today’s post: cheap, knock-off EverDrive clones. Before we get started, I want to say a few words on the subject. All of these EverDrive clones are based off of stolen designs and code and, while they may be cheap, they take money away from the original creator, Krikzz, who put in a ridiculous amount of work to develop such an incredible product. As of writing this, the official EverDrive Game Boy x3 is only $44, which is considerably less than you would spend if you tried to follow this guide to repair a broken clone device. If you’re in the market for a quality Game Boy flashcart, I highly recommend picking up a real EverDrive from the manufacturer or an official retailer.

A counterfeit EverDrive aka "Jack DIY" on the left with a legitimate EverDrive on the right
A counterfeit EverDrive aka “Jack DIY” on the left with a legitimate EverDrive on the right

Continue reading Un-Bricking an EverDrive Clone, AKA Fixing the Dreaded “Authentication Error” (part 1)

Quick Game Boy Advance Repair

Recently I was putting a backlit screen into a Game Boy Advance, which is a common and fairly easy mod. Unfortunately, the plastic outer shell didn’t want to close completely, so against my better judgement, I decided to file down the solder joints on the cartridge connector using a Dremel. While this did shave off a millimeter or so, the Game Boy no longer worked when I put it back together classic Game Boy games had a corrupted Nintendo logo and GBA games showed no logo at all. I figured that the vibration from the Dremel might have fractured some of the solder joints on either the cartridge reader or the CPU, so I reheated each of those pins to allow the solder to reflow and form cleaner joints.

At this point, classic Game Boy games now showed the proper logo, which allowed them to start, but there were some graphical glitches during gameplay, and GBA games still didn’t boot. Something was still wrong. Continue reading Quick Game Boy Advance Repair

Custom Game Boy Cartridge – Project Update #1

In this post I’ll be covering the process of getting the brains of my custom cartridge working; a Xilinx XC9572XL CPLD. Hang on to your hats.

First, let’s briefly talk about what a CPLD is. This chip is similar to an FPGA in that it provides the ability to reprogram its hardware, rather than running software. Unlike an FPGA, it has non-volatile memory, so the configuration will stay in the chip even after power is lost. The trade-off is that the amount of logic units is orders of magnitude smaller than an FPGA. Fortunately, this project is relatively simple, so I have no doubt it will fit within the limits of the chip. Unfortunately, I’ve never used a CPLD and my only experience with FPGAs was an intro logic class 7 years ago.

For this project we’ll be using the stable, light-weight, robust, intuitive and frequently updated software provided by Xilinx called Webpack ISE. What’s that? It’s a 6.5GB download split over four files? It requires an account to download a license? It’s laggy and confusing and was discontinued in 2013? Well hey, at least it’s free (and runs on Linux in addition to Windows).

Continue reading Custom Game Boy Cartridge – Project Update #1

Custom Game Boy Cartridge – Project Update #0

I just recently bought a new gaming console. It plays at a constant 60fps, is capable of display 8000x more colors than the previous generation console, has dynamic CPU speed control and runs on normal AA batteries.

Ok, so it’s not an XBox, or PlayStation or whatever the kids are using these days, but it’s still a pretty impressive piece of hardware. I should clarify — I’ve never really been much of a video game enthusiast, my interest in that area peaked when I was about 10 years old, so I’ve always had a special place in my heart for the Game Boy. Recently, I’ve been interested in understanding exactly how the Game Boy works, so I started working on an emulator (it’s halfway finished… Big surprise). I also found this really incredible cartridge that lets you load any games you want onto a MicroSD card and play them. While it’s great, it is rather expensive and there isn’t much documentation on how it works, so I decided I would dive in and try to make my own. Continue reading Custom Game Boy Cartridge – Project Update #0

Because I’m Too Lazy To Make Videos

I’ve been working on a few interesting projects lately and wanted a way to share them online. Despite enjoying similar content on YouTube, I’m way to lazy to put in the required effort to film and edit videos of my projects, so instead I’m going to attempt to document them in a blog…. because it’s always 2005 somewhere.

If you’re interested in circuit boards, software, Game Boy development and hobbyist electronics, stay tuned. Or whatever the blog equivalent is.


A sample of what’s to come