I realize what this looks like. First it was the Game Boys and now an N64? But it’s not like that, I’m not a retro game collector
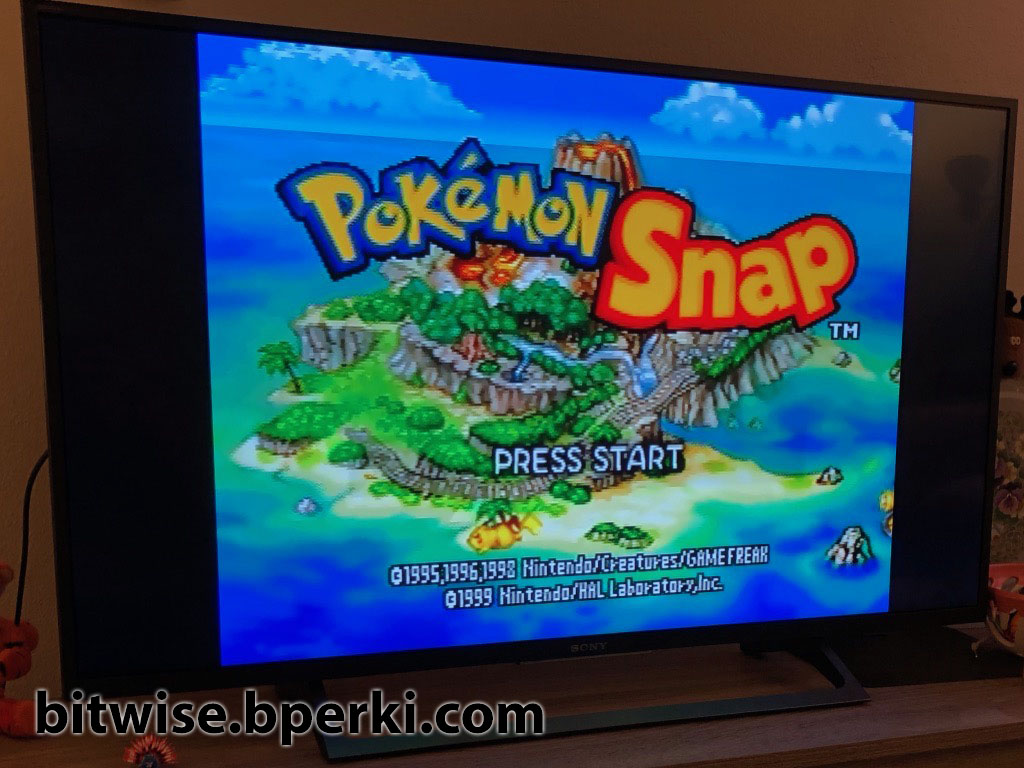
So my girlfriend did actually buy an N64 and a copy of Pokémon Snap recently due to childhood nostalgia (not that I can relate to that…). She set it up, plugged in Pokémon Snap, flipped the power switch and… Nothing. We tried a different game and that loaded up just fine. “No problem”, I thought. “I’m an engineer. I can solve this with my vast intellect and extraordinary skillset”. Well, it turns out that wiping down the contacts with rubbing alcohol didn’t solve the problem, so I did the only reasonable thing left to do and gave up.
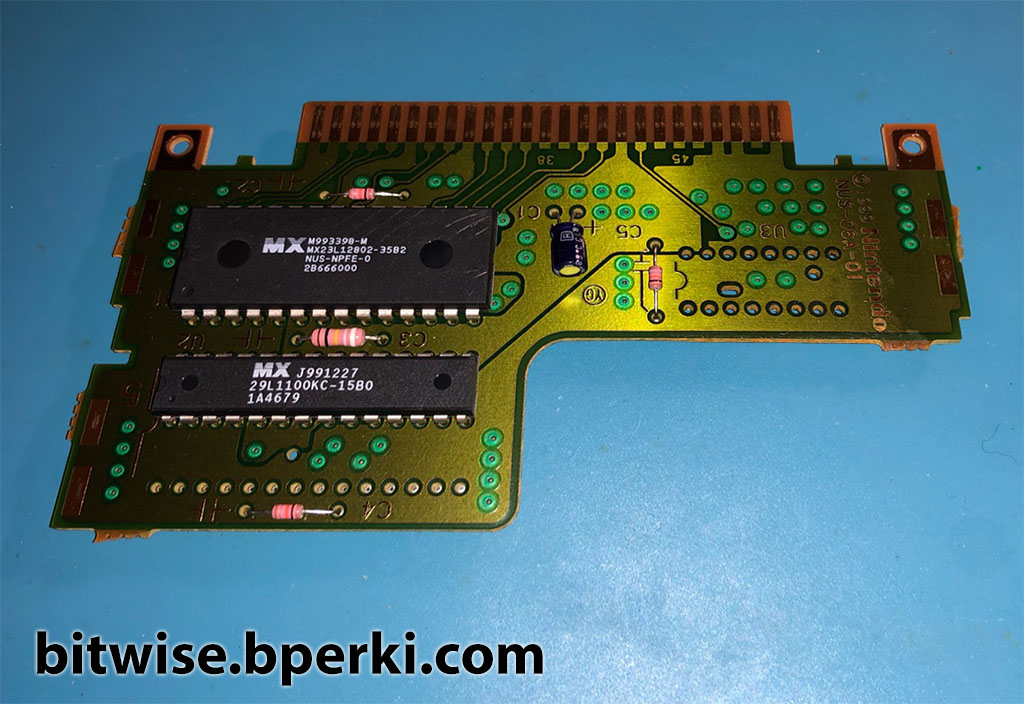
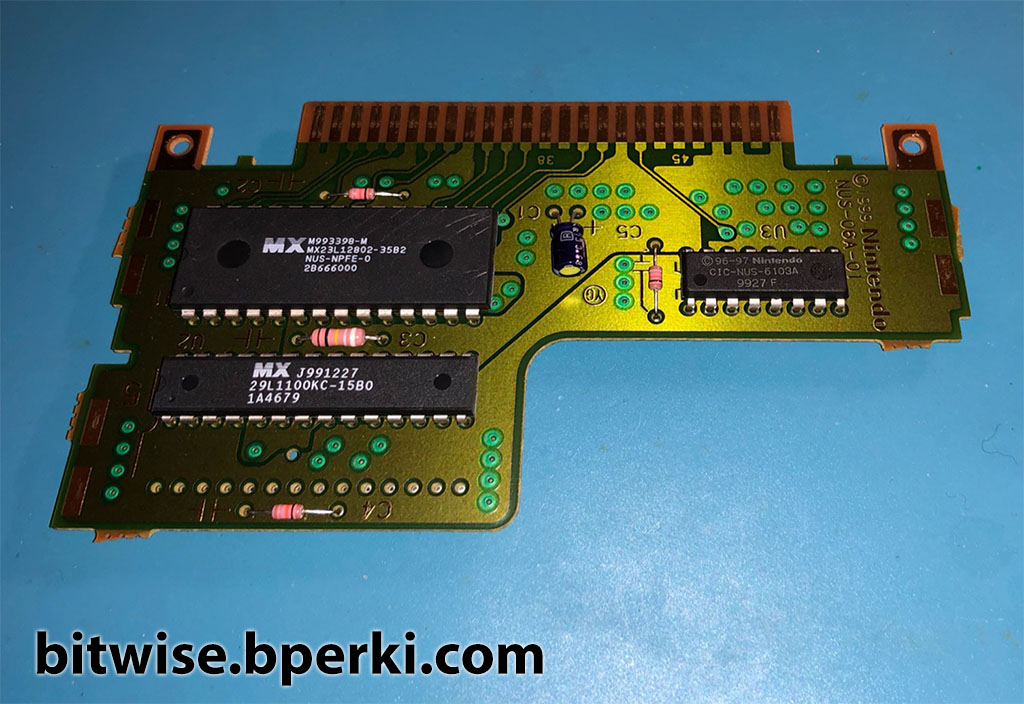
Fine, fine, I guess I have a couple more tricks up my sleeve. First I used my multimeter to test continuity between each of the edge connectors and the chips. After that, I used my microscope to examine the traces. Everything looked fine, although there was a strange 16-pin microchip that was only connected to a couple of traces that I didn’t recognize (remember, I’m into Game Boys, N64s are new to me). I typed the marking “CIC-NUS-6103A” into Google and learned that it’s a copy-protection chip that prevents unauthorized games from running on N64 hardware. One line that jumped out at me was “If the cartridge does not provide the authentication, then the CIC resets the CPU during every cycle until a game with the authorization chip is inserted. The constant resetting of the CPU stops the console from booting up”. That sounds like the issue I’m seeing, so I started to wonder if maybe this CIC chip had failed.
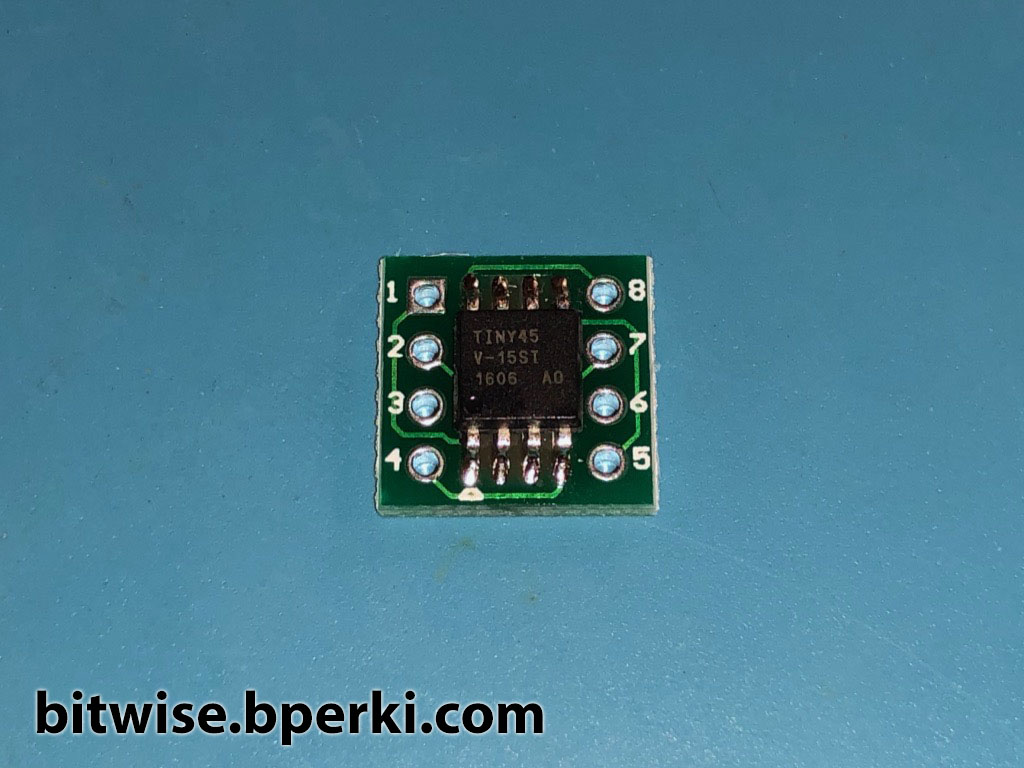
After reading up about these chips and going far deeper into the N64 history than I had anticipated, I found a forum post where a user by the name jesgdev talked about reverse-engineering the CIC code and cloning it onto an ATTiny25. Another thread in a different forum led to an update where users saturnu and krikzz modified the code to use a switch to alternate between NTSC/PAL regions. Since I only needed NTSC, I didn’t need to bother with a switch, but the modified version also came with tips for assembling it with avra, which I found very useful. The code allowed the user to specify which version of the chip to emulate, so I selected the 6103 variant that Pokémon Snap uses, I included an avra-compatible chip definition file for the ATTiny45 (which is the variant I had laying around), replaced the C-style comments (which caused avra to throw errors) with assembly-style comments, and assembled it. Complete source code is available on GitHub.
brew install avra
cp /usr/local/Cellar/avra/1.3.0_1/share/avra/tn45def.inc .
avra UltraCIC_t45.asm
Now that I had a hex file, it was just a matter of flashing it to an ATTiny45 and programming the fuses.
avrdude -p t45 -c usbtiny -U flash:w:UltraCIC_t45.hex -U lfuse:w:0xc0:m -U hfuse:w:0xdf:m
It’s important to note that once you do this, there’s no going back, this chip cannot be (easily) programmed again. The line -U lfuse:w:0xc0:m is telling the microchip to use an external clock
Now that I’ve written the obligatory “don’t mess up your fuses” caveat, the rest is easy. Just remove the old CIC chip and wire the ATTiny in its place. The wiring is:
| ATTiny45 Pin | CIC-Socket Pin | ATTiny45 Pin | CIC-Socket Pin |
| 1 – !RST | 9 | 5 – GND | 13 |
| 2 – CLK | 11 | 6 – CIC Clock | 14 |
| 3 – N/A | Not Connected | 7 – CIC I/O | 15 |
| 4 – GND | 6, 7, or 8 | 8 – VCC | 16 |
I happened to have an SOIC-8 breakout board, but it would work just as well soldering wires dead-bug-style. The soldering was actually quite easy. I soldered pins 5, 6, 7 and 8 directly to pins 13, 14, 15, and 16 and then used jumper wires to connect pins 1, 2, and 4. Using a through-hole ATTiny would work too, just bend pins 1-4 so they lay flat on the top of the board and solder wires directly from those pins to the correct holes.
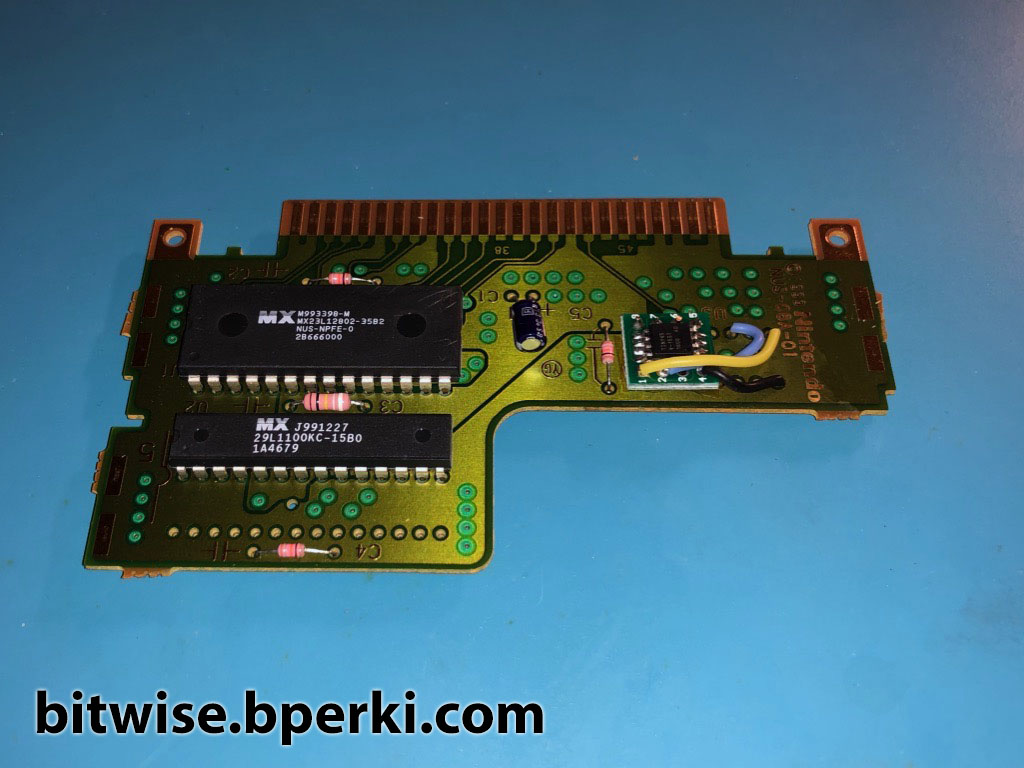
After I finished the soldering and put the case back together, I was able to plug it into the N64 and it booted up! All this without blowing on it, even once.